Miss Thrifty5 December 16, 2013

So, let’s recap an event that has probably taken place in your life at some point over the past few weeks. You have been in a shop, seen a rack of DARNED GORGEOUS Christmas tree decorations dangling there. Maybe some vintage-inspired ones, or some with a handmade touch? Then you have looked at the price tag… and made a stinkface. Tell me: were Christmas tree decorations always this dear?
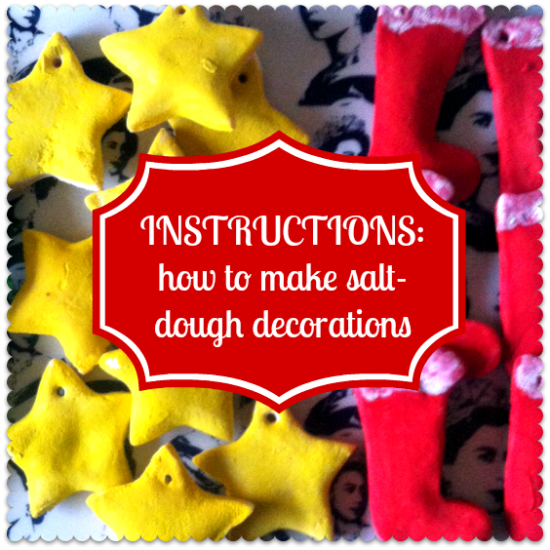
This year (unlike last year), we have a real tree – and Thrifty Kid and I have made the Christmas tree decorations ourselves, from salt dough.
If you haven’t made salt dough tree decorations before, start here. The recipe is easy. The decorations are pretty, and they will last year after year. And best of all, salt-dough decorations come in at pennies (see the price guide at the bottom of this post).
I featured salt-dough decorations as one of my Shortcuts to a Thrifty Christmas in a recent post I wrote for the Making Money Go Further blog. So here are the step-by-step instructions:
Ingredients:
2 cups of the cheapest plain flour you can find.
1 cup of the cheapest salt you can find.
1 cup of water
Christmas-themed cookie cutters (optional)
To decorate:
Paint
String
Trimmings such as glue-on gems (optional)
Instructions (thanks to Thrifty Kid for the demo):

To make the salt dough for your Christmas decorations, mix the flour, salt and water together until a dough forms. You are aiming for a pastry-like consistency that won’t stick to the rolling pin, so add extra flour if you need it.

Shake down some flour, and roll out the dough. I prefer a thickness of about 4mm to 5mm: any less, and the dough can stretch when you pull it from the board. Any more, and the decoration can be on the heavy side.
Stamp out your shapes using your cookie cutters. In my experience, the cheapest place to get festive cookie cutters at short notice is the supermarket: the ones in the pictures were 99p for a set of three from Morrisons. They are a couple of years old, but I notice that Morrisons is doing a plastic set of four, which include a bell and a Father Christmas face, for 99p this year. If you don’t have cookie cutters you can always do this freehand, with a small knife.
By the way, I forgot to do it with Thrifty Kid this time around, but if you have any children around, cut out their handprints and paint them up into Father Christmas faces. You hang the shapes upside down and the fingers become the white beard. Example here.
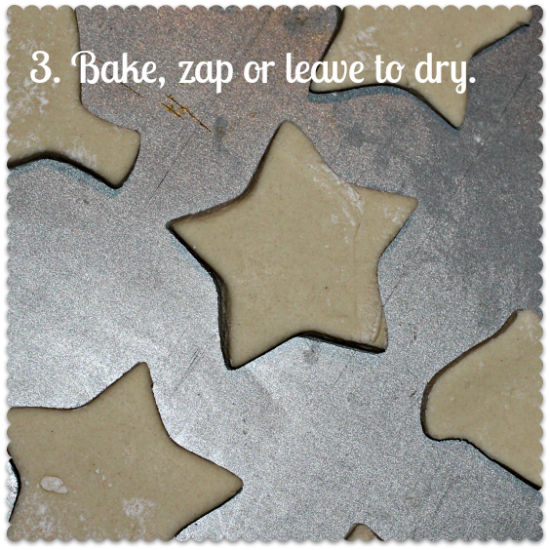
Place on a non-stick oven tray and bake on a low heat for 3 hours. Keep it low: think Gas Mark 3 / 160 degrees centigrade or thereabouts. Or, if you have a microwave, cook them in that for 3 minutes. If your decorations are still soft and clammy to the touch when they come out, give them another whirl for 20 minutes (oven) or 20 seconds (microwave). IMPORTANT: Don’t be tempted to turn up the heat. If you do that, the decorations will begin to puff up.
Leave to cool.
Alternatively, if you are working hard to keep your energy bills down at this time of year: don’t bake the salt dough shapes at all! Leave them out, and they will be dry within a few days.

Okay, time to get messy! When the salt dough shapes are cool and dry, you can decorate them as you wish. We used some of Thrifty Kid’s poster paint: £2.99 for 12 pots from The Works. But any odds and ends of household paint that you have lying around, if the colours suit your preference, will do a good job.
When the paint was dry (above), I took some PVA glue and stuck on some coloured gems. I bought this packet of coloured rhinestones for 99p from The Works, which has lots of gems, in a variety of colours and shapes.

All done! All that remains is to string ’em up. I have worked out that if you use budget-brand flour (45p for 1.5 kg from Tesco) and budget-brand salt (£1.10 for 3kg from Tesco), the salt dough ingredients listed above come to a grand total of 12p for that entire batch of salt dough. We made 24 shapes, so the cost worked out at 0.5p per decoration.
As for decorating the decorations: how you decorate and how much you decorate is up to you. If you go for razzmatazzy decorations like our ones, and you need to buy all your materials from scratch, the cost comes in at £3.98 excluding paintbrushes, string and a little glue. That works out at 17p per decoration – with plenty of paint and gems left over.
In other words:
Undecorated salt-dough decorations: 0.5p each.
Razzmatazzed salt-dough decorations: 17.5p each.
And to whoever said you need to spend good cash to get fancypants Christmas tree decorations: you can eat my leftover salt dough…

5 Responses to “HOW TO: make salt-dough decorations for your Christmas tree”
Catmac says:
Thrifty Kid is adorable!!!
I’ve done this in the past and made wreaths too. It’s a great tip.
December 16, 2013 at 7:50 pm
Amandah says:
This is the 2nd time in the last week that I’ve seen this idea.
Just another thing to add to my “Homemade Christmas 2014” list (yes, I do like to plan ahead).
As cute as he is, my sad face comes out abit.
Thrifty Baby is no more, he’s been replaced by Thrifty Kid. Oh how fast they grow, soon he’ll be off to college In the blink of an eye *sigh* 😉
December 17, 2013 at 1:03 am
Miss Thrifty says:
Ah, and there was me thinking I could do a nifty Thrifty Baby -> Thrifty Kid segue! He isn’t a baby anymore though, is he? I looked at these pictures and realised that sadly, I couldn’t cling onto that idea any longer.
Thank you for the kind comments. 🙂
December 18, 2013 at 11:23 pm
Elaine says:
Just read this tip. Fantastic!!!!
Would food colouring work to colour the dough instead of paint?
June 18, 2016 at 6:32 pm
Miss Thrifty says:
@Elaine – yes I think this would work. Just dilute it a little and bear in mind that it will take longer to dry.
June 26, 2016 at 9:40 pm