Miss Thrifty8 January 7, 2013
 (Throwback to 2013) Taking down the tree and decorations always feels so sad, doesn’t it? This weekend I’ve packed ours away, but before I did so I took a few photos to share with you.
In truth, I’d meant to post these in the week before Christmas, but our household was downed by one lurgy after another. Let’s just say that norovirus on Christmas Day was not a highlight! As much as I love Thrifty Baby, I wish he wasn’t such an efficient carrier of plague and pestilence. A tot at his nursery goes down with something and crashbangwallop, we have all got it. I am hoping for a healthier 2013, but I suspect that even writing that down is going to jinx it. He’ll probably come home with the dreaded chickenpox next week.
I did want to show you a glimpse of our rather unconventional tree though, before it disappeared forever. We usually get a real Christmas tree, but this time the prospect worried me. Thrifty Baby is pulling himself up on everything at the moment, and in our little house, it’s impossible to showcase a Christmas tree any way other than prominently. I foresaw a December spent prising the baby from the tree and (bits of) the tree from the floor. Also, last year I found it impossible to find a real tree round here for a non-eyewatering price.
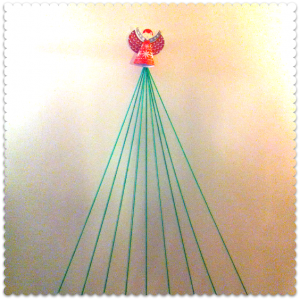
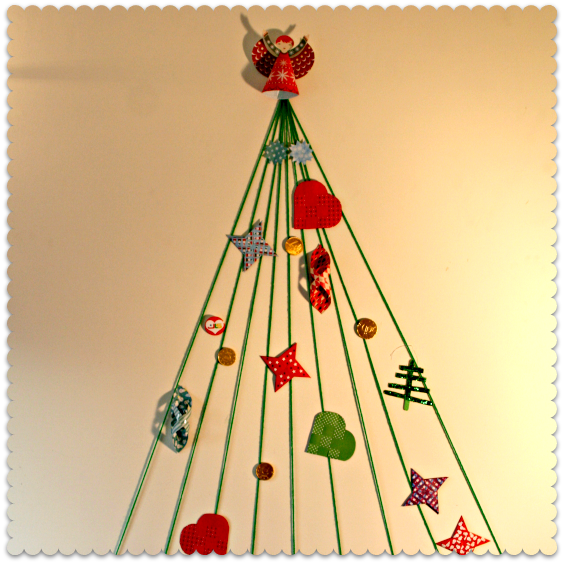
Inspiration was at hand in the form of this DIY Christmas tree on Apartment Therapy. It’s a very simple tree, made from string tacked onto the wall, with decorations tacked on top. I realised that we could put it high up, above the sofa, and Thrifty Baby wouldn’t get anywhere near it (mean parents – mwahaha). Here it is:
It took about 20 minutes to assemble and the total cost was £2.98: £1.99 for a ball of chunky green yarn from Yorkshire Trading and £0.99 for some chocolate coins from WHSmith. We made most of the rest of the decorations ourselves, from the DIY Christmas decorations book sent to me by Usborne. Thrifty Baby contributed the glittery green Christmas tree made from lolly sticks.
As for presents: well, I’m delighted to report that I met my target to buy for 16 people on a budget of £180. The bill came in at £165, including wrapping materials.
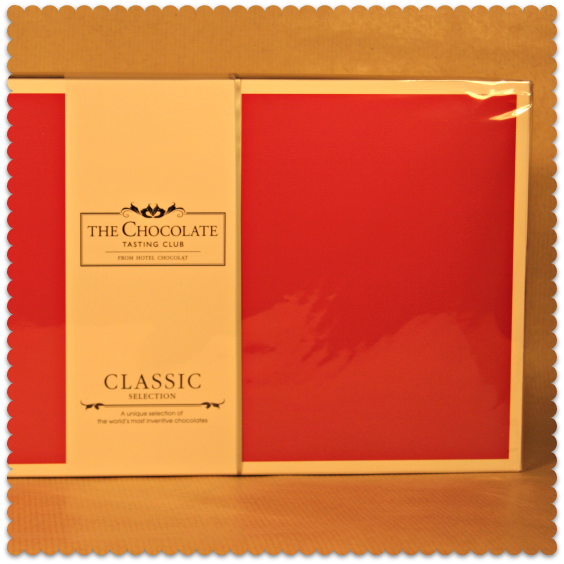
I was able to do this for two reasons. Firstly, I did all my online shopping using voucher codes and cashback sites, to get the best bargains. In fact, I hammered them. Here’s an example: a selection box from Hotel Chocolat, which usually costs £19.99:
Using the cashback site Quidco, I bought this box for £7.05. As previously mentioned, I’m coy about setting out each and every purchase along with its price tag, because some of the recipients read this blog and it would be a bit.. weird. But I can make an exception in this case, because the chocolate box went to Frugal Grandma. In true Frugal Grandma style, she was beset by anxiety because she didn’t want me to spend anything on her at all – and much happier when I explained how I’d snagged a delicious deal! My mum is the same: I am lucky to have family who adore bargains as much as I do.
Here’s Thrifty Baby’s present: a £2.99 rattle from The Works. He picked it up when we were in there buying presents for others, and wouldn’t put it down, so we knew we were onto a winner:
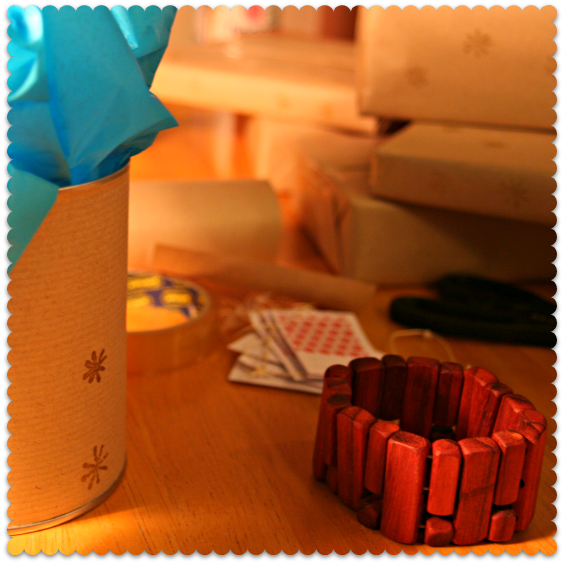
My other secret weapon was my talented husband: give him some tools, and a chunk of wood, and off he goes. We nicknamed his workshop Santa’s Grotto in the run-up to Christmas. After Thrifty Baby was safely in bed in the evenings, my husband would go back there and carry on making presents for everyone until about midnight. I’ll do a round-up of some of these in a separate post, but here’s a taster:
That’s a bracelet for my sister-in-law, about to go into its box. It’s made from a beautiful red hardwood called padauk.
You can also see some of the wrapping in that picture. I bought an eight-metre roll of brown parcel wrap from Asda for £0.99, which was enough for almost all the presents. I stamped the paper with gold snowflakes, and tied each present with ribbon. The ribbon was easy: I always keep ribbons from gift boxes etc., so I have a little stockpile here. The snowflake stamp was more difficult to find: there were plenty around, on eBay and in local craft shops, but they weren’t particularly cheap. In the end I found a crafts magazine with a free set of Christmas rubber stamps on the front. Even at £2.99, it was cheaper than the single stamps – and I reasoned that I can use more of the stamps next year. I pulled the snowflake stamp off and glued it to a stump of wood, for quick and easy stamping.
These pictures are making me long for Christmas all over again. Still, if 2012 is anything to go by, it will be upon us before we know it…


8 Responses to “Make Your Own Christmas Tree”
Julian Hearn says:
Wow, £165 for 16 presents that is seriously good going! Christmas is the one time of the year that I tend not to watch the pennies too much. I do of course try and use voucher codes and cashback sites, but the suitability of the present comes first, I really want the person to love it and use it. Which is not easy when trying to keep the cost super low.
January 7, 2013 at 4:35 pm
liveseygirl says:
Happy New Year. Quite a new reader here. Love your DIY tree. I sooo know what you mean about kid plague. We have two boys aged 3 and nearly 1. They always get something. I got the dreaded tummy bug on Boxing Day. My hubby works at DFS so I was reading them stories whilst stuck to the loo!! This week they have conjunctivitus. Never mind its all part of Mummyhood I guess xx
January 7, 2013 at 9:37 pm
Crumbs & Corkscrews says:
Happy New Year and another new reader here too! I absolutely love the DIY tree, although I adore our tree it is such a faff to put up and down & the simplicity of this one just rocks! And I’m not feeling so alone in the world, with using voucher codes for presents, and you can’t beat the Hotel Chocolat one with Quidco; used it many times :o) x
January 7, 2013 at 10:46 pm
Sheila says:
Happy New Year to all. LOVE the bracelet! And I did exactly the same thing with the brown paper wrapping. I got my brown paper in a sale earlier in the year at just 49p per roll of 15 metres – so I snapped up four of them as they were too good to miss. Oh, and the stamps on Magazines – yup, I do the same there too. I’ve got quite a collection of stamps now, all of them really quite beautiful. TIP: You don’t have to have a block of wood to glue the stamp to; Simply use a glue stick (cheap one will work) and the lid from your stamp pad – especially if it’s clear – if it’s not clear then find a clear top from hair product or I’ve even used the clear part of a box of cocktail sticks) – and ‘glue’ the stamp to the see through lid. This way you can actually SEE where you’re stamping. After you’ve finished you just wash off the glue in warm soapy water – or if you have alcohol free baby wipes they’ll work brilliantly – and bobs your uncle (as the saying goes!).
Fun idea for the tree – I can see how well that would work where little fingers are concerned!
January 8, 2013 at 1:19 pm
Janice says:
ive been looking a lot at alternatives to a tree but just can’t resist a real one. we keep our Christmas budget at a reasonable level by agreeing on an upper limit for gifts with family. we’ve been doing it for years. sometimes it can seem a bit Scrooge like but it definitely avoids the present ‘arms race’ that can happen.
January 8, 2013 at 8:06 pm
Diane Schafer says:
I do like this tweet (and most of your other tweets). One questions where did you get the ink that you used for the stamp pad?
January 9, 2013 at 3:57 pm
Daniel says:
Thanks for the tips. I don’t think we could really go without the diy cut down tree, but my wife loved the ideas of using stamps with gifts (especially for our daughter) and the bracelet
January 12, 2013 at 4:10 am