Miss Thrifty6 April 13, 2014
Remember those gorgeous scented candles I found in Waitrose? Like Diptyque, but a fraction of the price? I promised some tips and tricks for making your candles last longer, and here they are.
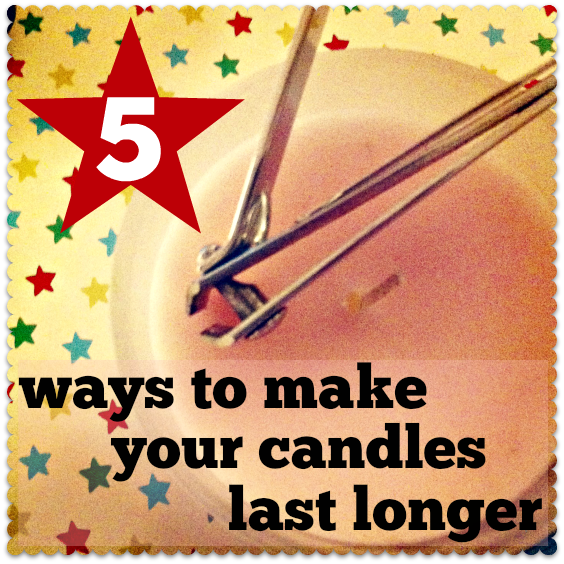
You will need: nail clippers, a ruler, a stick of dry spaghetti and an eye on the clock.
1. Pick at that wick.
Candle buffs decree that there is a correct length for a wick: it should be exactly 1/4 of an inch long. If your wick is longer than this and you have a jar candle, you may end up with soot on the jar and a big flame that burns your candle down mighty fast. However manufacturers – even posh ones like Diptyque – don’t trim the wicks. So to get the most out of your candle, you’ll have to do it yourself.
Trim the wick of the candle to 1/4 of an inch before you use it for the very first time, and trim if necessary before each and every use. You can do it with scissors and a ruler: but like a lot of things that sound super-simple when you read them online, the reality can be darned fiddly. If you have a jar candle, once it has burnt down a little it becomes a total fiddle to try and stick a pair of scissors in to trim the wick. Hence the nail clippers!
The other thing is, with a jar candle it can be difficult to measure and trim to 1/4 of an inch exactly. Even if the wick is high in the jar, you can’t just stick the ruler in and snip. The ruler can be too big or cumbersome, or it doesn’t measure right to the edge. I use strands of spaghetti for lighting candles (we don’t smoke, so there are no lighters or matches in the house), so I have found it easier simply to measure and snip off a 1/4 of an inch of a spaghetti strand. I stick it in the wax next to the wick, and use that as the measure to clip the wick to size. (If you look really carefully in the picture above, you can just about spot a little dod of spaghetti next to the candle wick.)
2. Let it burn, burn burn.
“Tunnelling” is when a lit candle creates a pool of melted wax surrounded by a ridge of hard unmelted wax, and simply won’t burn to the edges.The biggest cause of tunnelling is because people don’t leave their candles burning for a sufficiently long time. The tunnel around the wick in the wax gets deeper and deeper, until the candle becomes difficult to light and the wick drowns. Avoid this from the get go, by giving your candles good, long burns. Ideally, you want to burn your candle until the molten wax reaches the edge of the jar or, if it is a votive candle, until the molten wax pool approaches the candle edge.
The very first burn is all-important: if the candle doesn’t burn long enough to reach the edge on its first outing, chances are it will never get there. The general rule of thumb here is to allow one hour per inch of diameter. So if you have a jar candle with a four-inch diameter, you should let it burn for at least four hours. This isn’t always practical, but remember that candles should never be left unattended. That way lies fiery infernos.
3. Location, location.
Use your noggin: don’t leave a lit candle in a draught. It can cause the candle to smoke, drip or burn on one side only. In practice, this may mean keeping your candles away from poorly-insulated windows.
4. Freeze!
Pop your candle into the freezer at least a day before you intend to light it: the candle will last up to twice as long as a result.
Be aware, however, that some candle buffs claim that candle wax will crack if frozen – which may be one way to shorten the life of your candle, if it isn’t a jar candle and melted wax is free to ooze out between those cracks. So if you have a bunch of candles, you may wish to test one in the freezer before bunging the lot in.
5. Make those candles multi-task.
A bit of a cheat, this. But if it’s a lovely smelly candle and you aren’t going to use it immediately, stick it at the back of a bedroom drawer or wardrobe until its time comes. With scented candles in the house, who needs to fork out for scented drawer liners?
Any other ways to turn a candle into a waxy equivalent of Mumm-Ra, the Ever-Living? If you know of any, please share…
6 Responses to “HOW TO: make your candles last longer”
Alyssa says:
I knew the freezing one but not the others thank you
April 14, 2014 at 1:38 pm
J. Money says:
Haha… for a hot second there I thought this was a post on how to make your “CANDIES” last longer! I was gonna say – just stop eating them! 😉
April 14, 2014 at 5:10 pm
Jessica says:
Mutitasking scent: I do the same with nice smelling soaps, if I’m not using them immediately I put them drawers or hang them from a hanger in a little pouch to scent my wardrobe
April 29, 2014 at 3:48 pm
caroline says:
Great post! Never knew freezing a candle could do that! – Caroline
May 20, 2014 at 5:11 pm
Char says:
Any ideas on how to burn the last bit of candle? The wick being at the bottom already, it doesn’t burn the sides, which are about 0.5 of an inch high in my lovely True grace candle…. as such it will unlight just after being lit 🙁
August 23, 2014 at 12:41 pm
Katy Stevens says:
These are fantastic tips – thank you so much!
January 5, 2017 at 2:24 pm